Installing solar panels is a great way of saving electricity costs, but many people are still curious about what would happen to the surplus energy produced by their system. This is where net metering becomes important, as it connects the solar system to the grid and allows for control of energy consumption and production.
In this guide, we will understand what net metering for solar is, how it works, and how to apply for net metering.
What is Net Metering for Solar?
Net metering is a billing system that credits solar energy system owners for the electricity they add to the grid. If you have a net metering for rooftop solar system, you only pay for the “net” energy you use.
For example, if your house uses 500 units of power in a month, but your solar panels produce 400 units, you only pay the power company for the 100 units you took from them.
Without this system, you would need expensive batteries to save your extra power. Net metering makes solar much more affordable because it uses the public grid as a free storage space. This significantly shortens the solar panel payback period because every bit of energy your panels make is used to lower your bill.
How to Apply for Net Metering
Applying for a net meter for solar panels is usually done through your local electricity provider’s website. Here are simple steps to follow:
Step 1: Check Eligibility Before You Apply
You should check if your property and your electricity connection are eligible for net metering as per the DISCOM rules in your state. The electricity connection must be in the name of the property owner or authorized consumer. It is essential to have enough space and sunlight on the roof for the installation of the solar panels. It is important to check the allowed capacity of the solar system as per the type of connection and sanctioned load.
Step 2: Register on the Solar Portal
Create an account on the official online portal specified by your state’s DISCOM or the national rooftop solar portal, if applicable. Give the necessary details, including your consumer number, mobile number, email address, etc. After signing up, log in to your account and fill out the online application for net metering. Give exact details of your electricity connection and the planned rooftop solar system in the application.
Step 3: Submit the Required Documents
Submit the necessary documents with the application. The list might differ for each state, but the commonly required docs include, but are not limited to:
- Latest electricity bill
- Identity proof of the consumer
- Address proof
- Proof of property ownership or authorization
- Proposed solar system details
- Single-line diagram (SLD) of the solar system, if required
- Technical specifications of the solar equipment, if required
- Any additional documents requested by the DISCOM
All documents submitted should be clear, proper, and correspond to the information provided in the application form. Undelivered or incorrect documents may be the cause of an extended approval process.
Step 4: DISCOM Feasibility Approval
Once your application is received by the DISCOM, the technical parameters are analyzed to decide if the local electricity network can cater to the new solar rooftop system. In this phase, the consumer data, sanctioned load, capacity of the system, and current electrical facilities are checked.
Step 5: Approval and Registration
After completing the feasibility study, the DISCOM gives its approval for the application and registers the rooftop solar project for net metering. A notice of approval is generally conveyed to the consumer via the online portal and/or via email or SMS.
Step 6: Sign Net Metering Agreement
Net Metering Agreement is signed between the consumer and the DISCOM before the installation of the net meter. The agreement contains the rights and responsibilities of both parties, such as how the energy sent out to the grid is monitored and how billing will take place. Read the agreement properly before signing to make sure that the terms and conditions are properly covered.
Step 7: Install the Solar System
After receiving approval, install the rooftop solar system according to the approved design and applicable technical standards. The installation should match the capacity and specifications approved by the DISCOM. All electrical connections, safety devices, inverter settings, and wiring should comply with the required regulations to ensure safe operation and successful grid connection.
Step 8: Submit Completion Report
After the installation is completed, submit the completion report through the prescribed process. The completion report verifies that the solar system has been installed according to the approved design and technical specifications.
The report may include installation details, test reports, photographs, and other documents as specified by DISCOM. After the review of the Completion Report and final inspection, the net meter is installed, and the system is connected officially to the electricity grid.
How Solar Net Metering Works
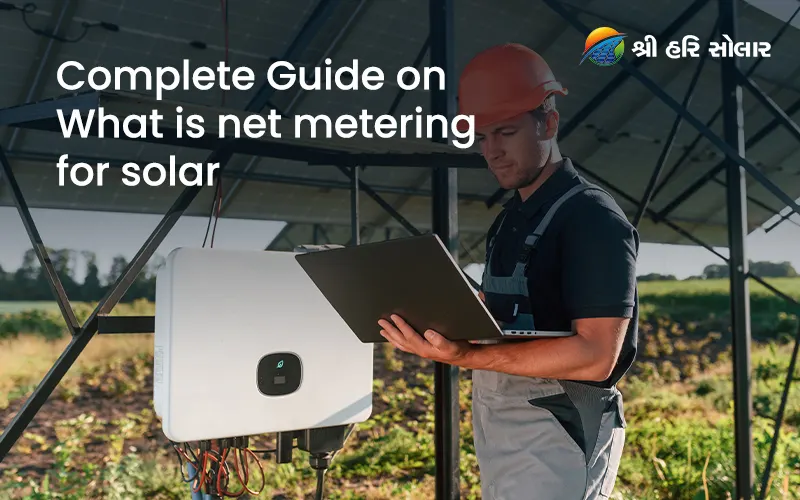
Solar net metering is a system that allows solar panel owners to send extra electricity generated by their solar system back to the electricity grid. A special bi-directional meter records both the electricity used from the grid and the excess electricity sent to the grid.
During the daytime, solar panels generate electricity. The generated power is first used to run home or business appliances. If the solar system produces more electricity than needed, the extra power is exported to the grid.
At night or when solar generation is low, electricity is taken from the grid as usual. The net meter calculates the difference between the electricity consumed and the electricity exported during the billing period.
If more electricity is exported than is consumed, the user may receive credits under the applicable solar net metering rules. These credits help reduce the electricity bill.
Solar Net Metering Rules in Gujarat
Gujarat has some of the best solar rules in India. The state government wants more people to use clean energy. However, the rules can vary slightly depending on who provides your power. For example, the Net Metering Process: Torrent Power vs. DGVCL might have different online portals or slightly different document requirements. Torrent Power is a private company, while DGVCL is a government-owned company, so their internal steps might vary.
If you live in South Gujarat, you might wonder why my DGVCL solar bill is high even after putting up panels. This often happens if the net meter has not been installed yet or if there is an error in reading the bidirectional meter. In Gujarat, the rules allow residential users to get credits for extra power, which are then settled at the end of the billing cycle. It is vital to follow the rules closely to ensure you get your subsidies and bill credits on time.
Net Metering Process
Getting your system approved involves a few specific steps. This ensures that your solar setup is safe for you and the workers who fix the power lines in your neighborhood.
Step 1: Online Registration
The process starts with an online application on the DISCOM portal (like DGVCL or PGVCL). You provide details about your electricity connection and the solar system you plan to install. You will also have to pay a small registration fee. This step officially puts you in the system for a solar upgrade.
Step 2: Technical Feasibility Approval
After you apply, the power company’s engineers check the local grid. They want to make sure the wires near your house can handle the electricity your panels will send back. They will check the capacity of the local transformer. If the grid is too full, they might limit the size of the solar system you can install.
Step 3: Installation & Safety Inspection
Once you have the feasibility approval, your vendor installs the solar panels. After the work is done, a safety inspector or a DISCOM official may visit. They check if the wiring is correct and if the “anti-islanding” feature works. This feature stops your solar system from sending power to the grid during a power cut, which protects repair workers.
Step 4: Procurement of the Meter
Now you need the actual bidirectional meter. In many cases, you can buy this from the power company, or you can buy a tested meter from an approved seller. This meter is different from your old one because it can record power moving in two directions. Many people ask, is solar net metering free in India? While the policy exists, you usually have to pay for the meter itself and the testing fees.
Step 5: Meter Installation & Commissioning
The final step is when the DISCOM team replaces your old meter with the new bidirectional one. They will sign a commissioning report. This is the official “start” date for your solar savings. From this day forward, your extra energy starts counting as credit on your bill.
Why a Professional Site Survey is Critical for Net Metering Approval
The need for a professional site survey arises because a site survey ensures that the solar system installation follows the technical standards and safety requirements required by the utility company for net metering application and approval.
The important elements in the survey include the roof condition, amount of space available, sunlight availability, electrical connections, meter placement, and the power system details. This information ensures that the proper solar system design as well as documentation for net metering can be prepared.
A solar site survey minimizes the risk of getting approvals delayed, errors in the design, and complications during the inspection. With its help, it can be confirmed that the installed solar system meets the requirements of the electricity distributor and connects safely to the electric grid.
Conclusion
Net metering is the secret to making solar power a great investment. It allows you to use the power grid like a battery, saving you money and reducing waste. By understanding the net metering for solar process, you can move toward energy independence with confidence.
Whether you are under DGVCL or Torrent Power, following the steps carefully will ensure your bills drop, and your solar panels pay for themselves quickly. If you are ready to save, start by getting a professional site survey to see how much you can benefit from this amazing system.
FAQs
Is net metering mandatory for rooftop solar in India?
Net metering is not mandatory, but it is the most beneficial system for residential users. It allows you to offset your electricity consumption and get credits for excess power sent back to the grid.
Do I have to pay anything for a bi-directional solar meter replacement?
Yes, homeowners generally pay for the cost of the bidirectional meter and the required testing fees. These costs are separate from the solar panel installation costs.
What happens to my net metering data if there is a power cut?
During a power cut, the solar system shuts down for safety reasons (anti-islanding). The meter stops recording as no energy is being exchanged with the grid during the outage.
Can I get a negative electricity bill with net metering?
Yes, if your generation exceeds your usage, your bill will show a credit. These credits are usually adjusted in future bills within the same financial year.
What is the main difference between net metering and gross metering?
Net metering allows you to use your solar power first and export only the excess, while gross metering exports all generated power to the grid at a fixed rate, and you buy back all the power you need.